
[Ahnemon hafla, London]
Aloha kākou!
Here are three quick(ish) tutorials on how to make a hula skirt (pāʻū), based on my own sewing experience over the years. Choose from a no-sew option, single waistband, or multiple waistbands using elastic or ties.
I’ve included instructions on how to add a top frill, make a skirt that is open to one side, and create a matching top. Plus some useful links to buy materials online and import skirts from Hawaiʻi.
How do I store my pāʻū? Carefully! You can make or buy skirt storage bags (a long narrow tube with elastic at each end). Personally I like yoga mat bags – they are the right size to take one or more skirts, are often waterproof, and many have handles, pockets, and hanging straps.
Important: The correct spelling is pāʻū – paʻu, paʻū, pau do not mean “skirt”, but search functions still seem to have trouble with ʻokina and kahakō!
DISCLAIMER
HĀLAU AND HULA SCHOOLS OFTEN HAVE GUIDELINES FOR CLASS PĀʻŪ SKIRTS (CONSTRUCTION, FABRIC, COLOUR, DESIGN, LENGTH) – THESE TUTORIALS ARE FOR GENERAL PURPOSES ONLY
No-sew skirt for hula
WHAT YOU NEED
- At least 3 metres of fabric (or 5…for hula reasons)
- Tie: waist measurement + at least 50 cm
Measure your waist and add at least 50 cm to give enough left over to tie. Double that if you want to tie more than one wrap for security.
Your tie can be almost anything, like curtain cord, drawstring cord, braided strips of fabric, or a length of elastic. Avoid household string as it’s generally not strong enough and ribbon tends to curl and dig into your waist.
You’ll need at least 3 metres of fabric, or 5 metres if you want more volume.
Any fabric will work as long as it has some body. Think linen and cotton rather than chiffon or silk. Polycotton is ideal as it comes in every colour imaginable, is easy to care for, and is on the cheaper end at around £2 – £3 per metre.
Wash and iron your fabric to get rid of any shrinkage, then add any decoration or printing.
If you don’t have an extra pair of hands available, make sure your tie is within easy reach!
The long edge of fabric is called the selvedge and doesn’t fray, so we don’t have to worry about that. If the short edges are raggedy or you want the skirt to last longer, you might want to finish them by hemming or using something like Fray Check.
Take your fabric and hold it so that the bottom edge falls around the middle of your lower leg.
Start wrapping the fabric around your body; it doesn’t have to be too neat at this point, you’ll rearrange it later.
Get your tie and wrap it around your waist, then tie off to one side.
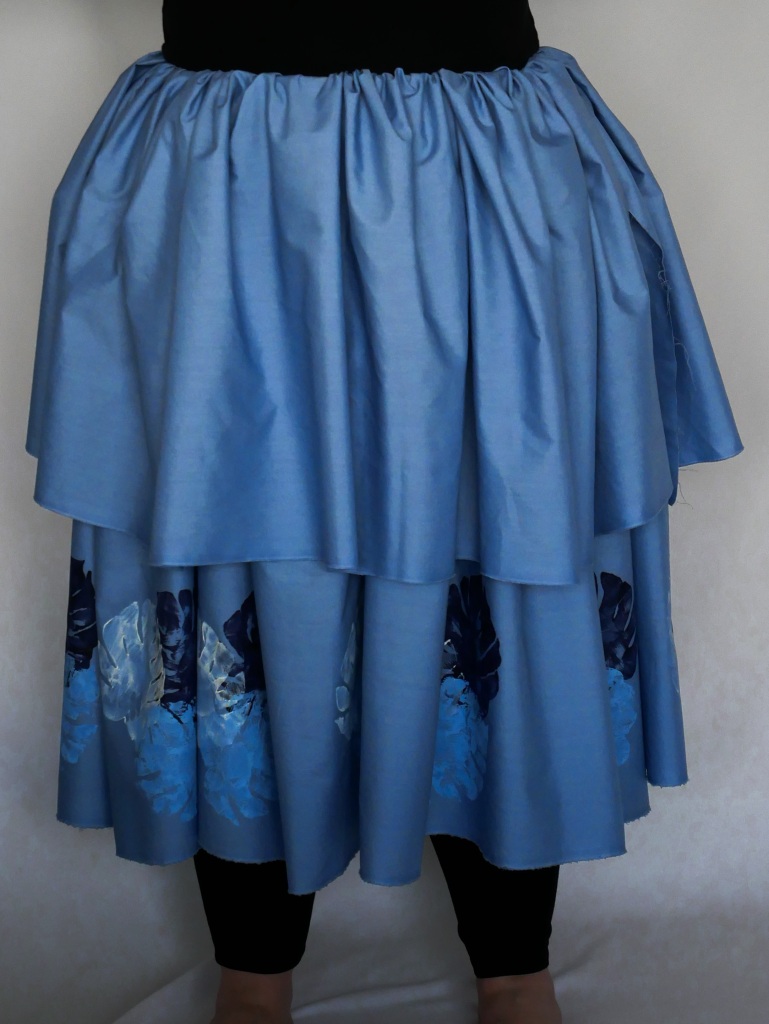
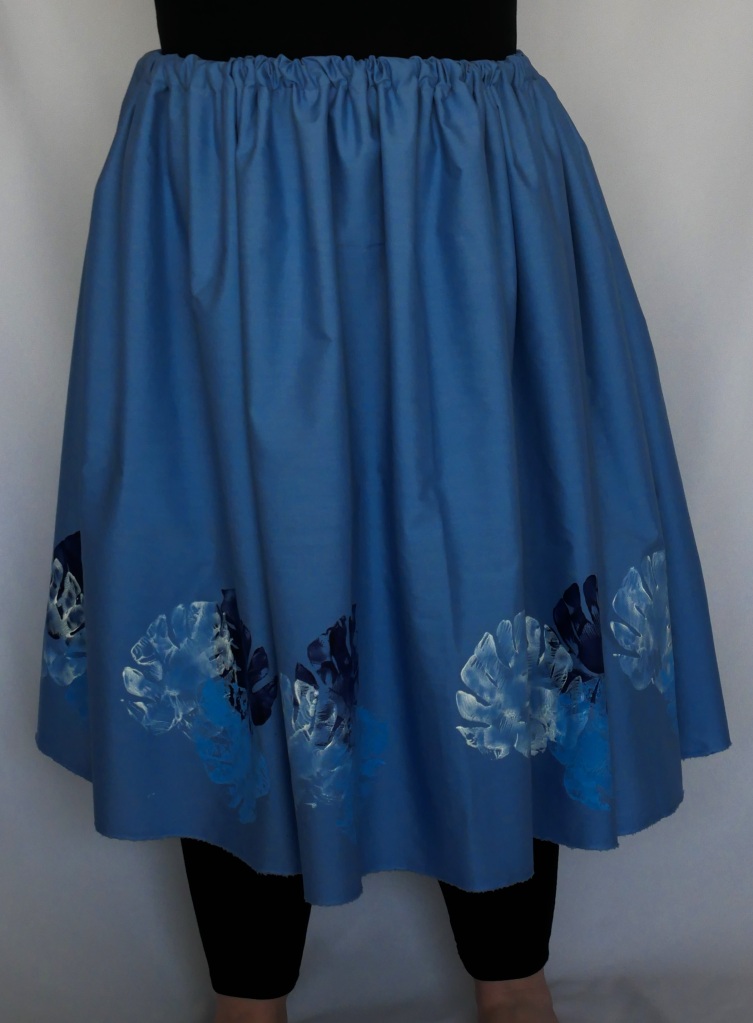
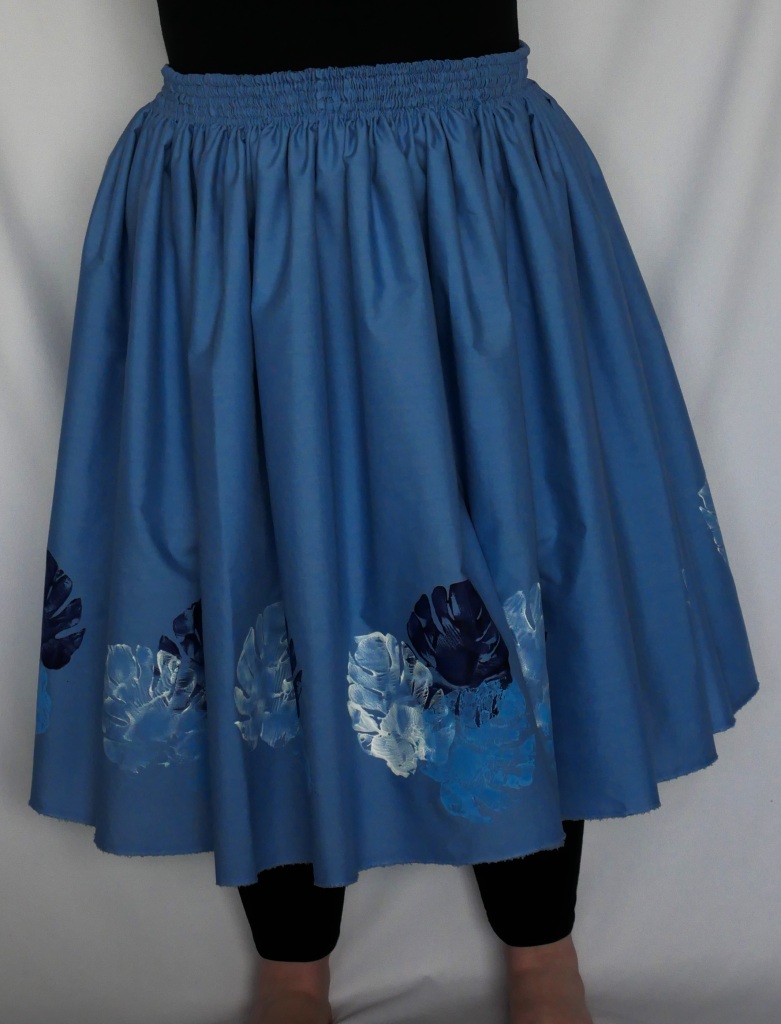
Fold over the fabric above the tie to form a deep peplum and arrange everything so that the gathers are even, the length is even at the bottom, and the skirt is open to one side. You can overlap the edges a little if it feels too gappy.
Alternatively, you can fold the fabric over the cord to the inside so there’s no peplum on the outside. Bonus: the extra fabric inside will give the skirt more volume!
For class, make sure to wear this with leggings or shorts underneath!
single-waistband skirt
WHAT YOU NEED
- At least 3 metres of fabric (or 5…for hula reasons)
- Elastic: 1” (25 mm) x your waist measurement
- Thread to match fabric
- Sewing machine or needles for sewing by hand
Measure your waist and make sure you have at least that length of elastic. You could also skip the elastic and use a tie made of cord, braided fabric strips, or something similar (see TIED OPTION).
You’ll need at least 3 metres of fabric, or 5 metres if you want more volume.
Any fabric will work as long as it has some body. Think linen and cotton rather than chiffon or silk. Polycotton is ideal as it comes in every colour imaginable, is easy to care for, and is on the cheaper end at around £2 – £3 per metre.
Wash and iron your fabric to get rid of any shrinkage, then add any decoration or printing.
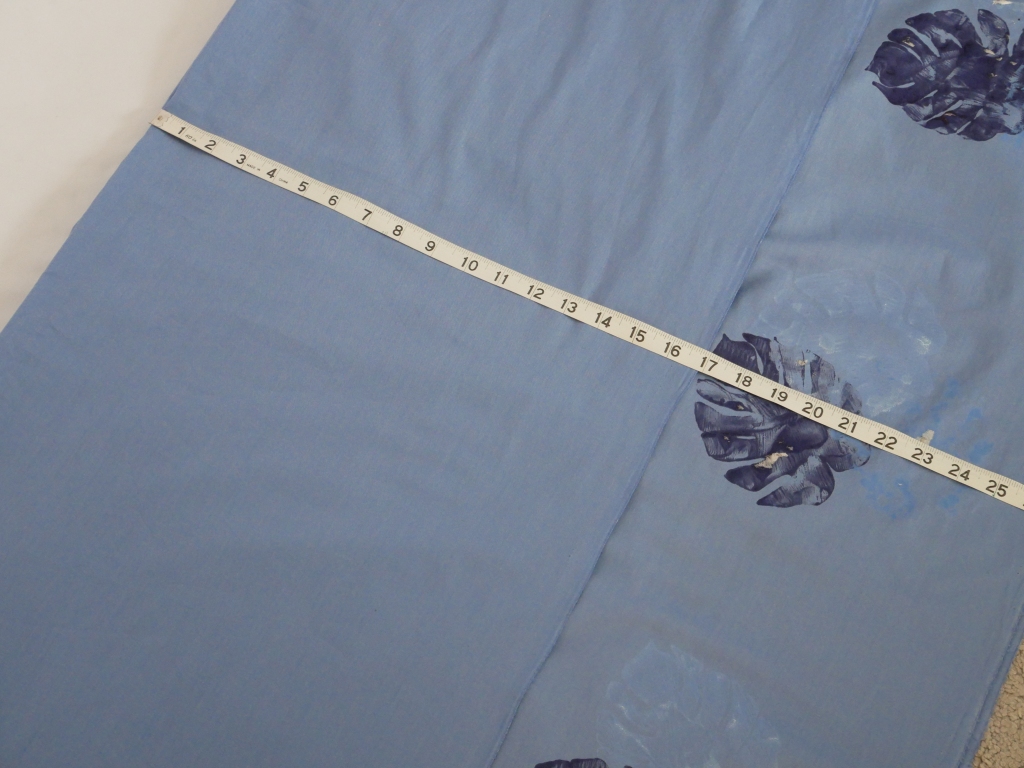
Measure from your natural waist (the narrowest part of your body) down to around the middle of your lower leg (a). If you don’t have an extra pair of hands available, stand in front of a mirror.
We don’t have to worry about the bottom edge here, because the selvedge doesn’t fray.
So, first sew the short edges of the fabric together, making a tube. If your fabric has a right and wrong side, make sure to sew right sides together.
With your tube laid out flat, mark your measurement (a) on the fabric.
Fold the top edge down towards you along the entire length and pin it in place. If your fabric has a right and wrong side, make sure the wrong side starts facing you.
“TOP FRILL” OPTION: Sew the short edges of the fabric together, making a tube. If your fabric has a right and wrong side, make sure to sew right sides together.
With your tube laid out flat, mark your measurement (a + 1″) on the fabric and then fold the top edge down towards you along the entire length and pin it in place. If your fabric has a right and wrong side, make sure the wrong side starts facing you.
Measure down 1” (25 mm) from the folded edge and mark or pin. Sew a straight line 1” (25 mm) from the top edge along the entire length of your fabric.
This line of sewing is now the top edge of your skirt.
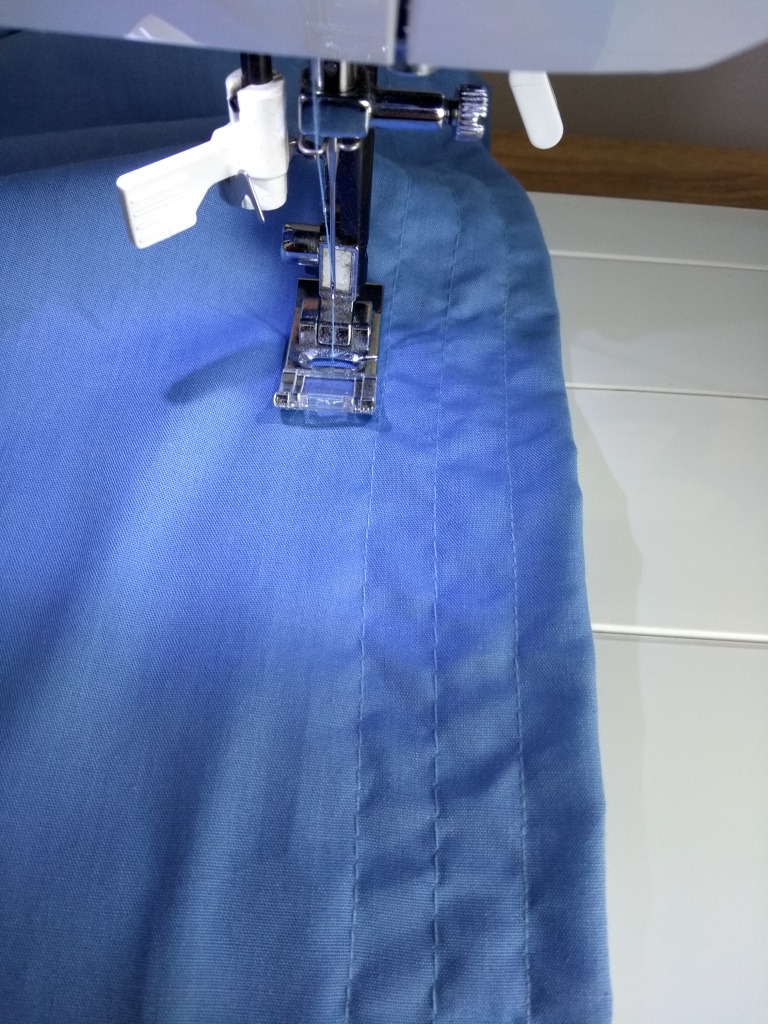
Measure down 1.25” (32 mm) from the top edge and mark or pin.
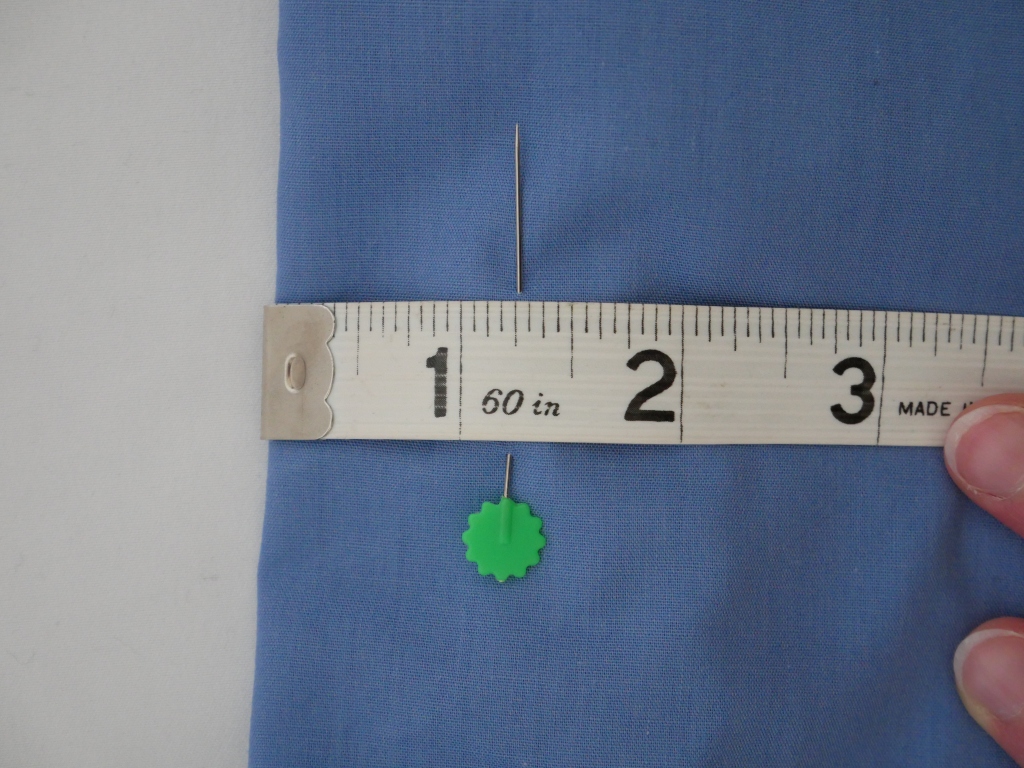
Sew a straight line 1.25” (32 mm) from the top edge along the length of your fabric.
Stop sewing about 2” (5 cm) before you get back to the starting point.
You can leave the excess fabric or cut it away with pinking shears so it won’t fray. Leave at least a couple of inches to make sure the stitching holds.
Time to insert the elastic! Take a safety pin and attach it to one end.
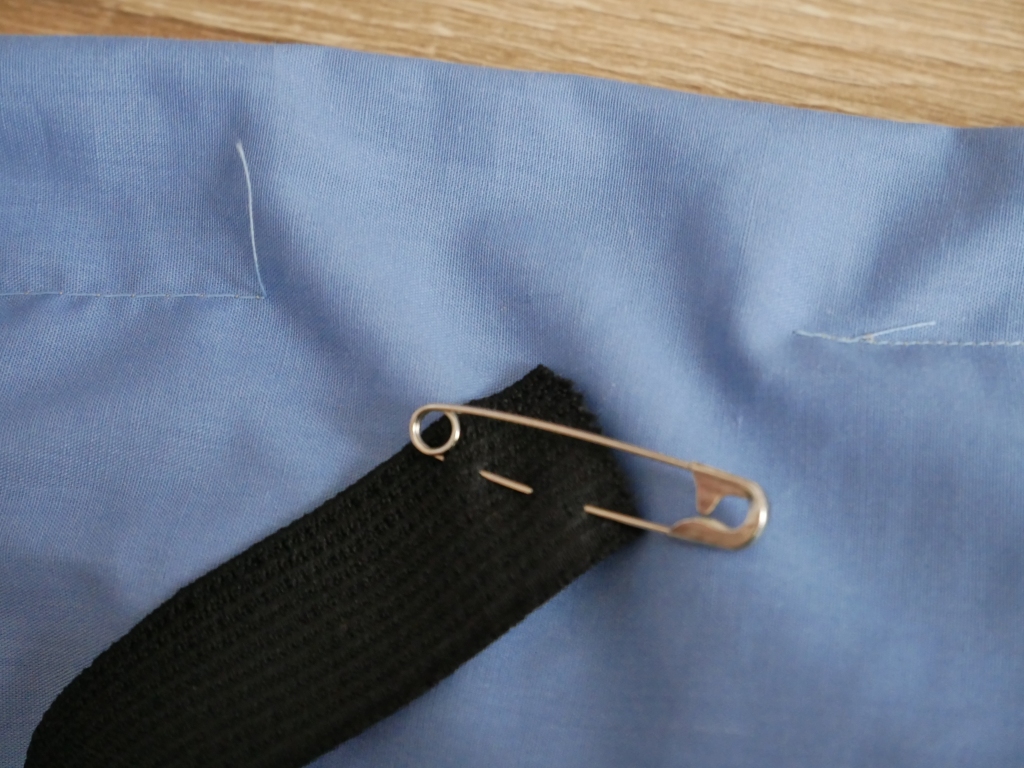
Insert this into one side of that 2” gap and thread all the way through. Pin or tie the elastic together for the moment.
Carefully(!) turn your skirt the right way out, try it on, and move the elastic until it’s comfortable around your waist. Pin or mark the elastic at that point.
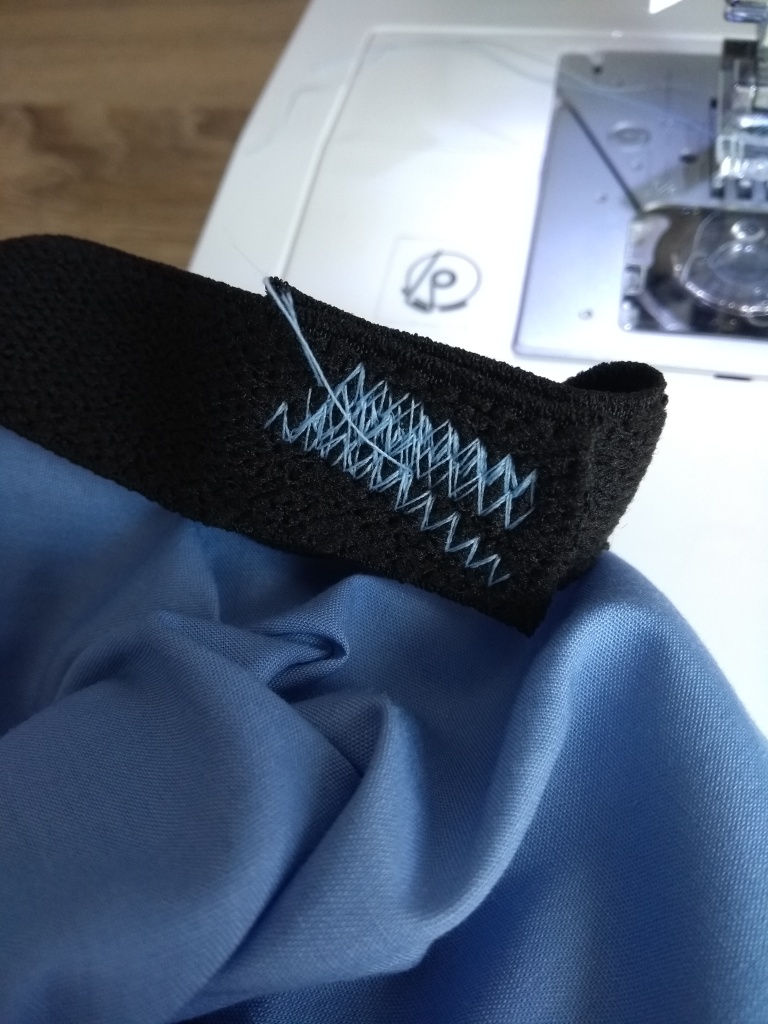
Sew the elastic together. The zig zag stitch on a machine is great for this; go over it lots of times to secure.
Finally, go back and complete the original line of stitching to close the gap.
TIED OPTION:
Instead of elastic, you have the option to insert a tie. Make sure to leave the 2” gap open here otherwise you won’t be able to reach the ends!OPEN SIDE OPTION:
You could choose to leave your skirt open to one side (and wear leggings or shorts underneath). For this option, just omit the first step of sewing the short edges together. This gives you a length of fabric with a casing at the top for a tie. You might prefer to finish the short edges for neatness and longevity.
multiple-waistband skirt
WHAT YOU NEED
- At least 3 metres of fabric (or 5…for hula reasons)
- Elastic: 1/4” (6 mm) x your waist measurement x (number of channels)
- Thread to match fabric
- Sewing machine or infinite patience and needles for sewing by hand
Decide how many channels you want at the waist. Some people find 3 wider channels plenty, others prefer 5 narrower channels with alternating elastic/cord and gaps for comfort, or 5 narrower channels all with elastic/cord. Measure your waist and make sure you have at least that length of elastic x your preferred number of channels. You could also skip the elastic and use ties made of cord, braided fabric strips, or something similar (see TIED OPTION).
You’ll need at least 3 metres of fabric, or 5 metres if you want more volume.
Any fabric will work as long as it has some body. Think linen and cotton rather than chiffon or silk. Polycotton is ideal as it comes in every colour imaginable, is easy to care for, and is on the cheaper end at around £2 – £3 per metre.
Wash and iron your fabric to get rid of any shrinkage, then add any decoration or printing.
Measure from your natural waist (the narrowest part of your body) down to around the middle of your lower leg (a). If you don’t have an extra pair of hands available, stand in front of a mirror.
We don’t have to worry about the bottom edge here, because the selvedge doesn’t fray.
So, first sew the short edges of the fabric together, making a tube. If your fabric has a right and wrong side, make sure to sew right sides together.
With your tube laid out flat, mark your measurement (a) on the fabric.
Fold the top edge down towards you along the entire length and pin it in place. If your fabric has a right and wrong side, make sure the wrong side starts facing you.
“TOP FRILL” OPTION: Sew the short edges of the fabric together, making a tube. If your fabric has a right and wrong side, make sure to sew right sides together.
With your tube laid out flat, mark your measurement (a + 1″) on the fabric and then fold the top edge down towards you along the entire length and pin it in place. If your fabric has a right and wrong side, make sure the wrong side starts facing you.
Measure down 1” (25 mm) from the folded edge and mark or pin. Sew a straight line 1” (25 mm) from the top edge along the entire length of your fabric.
This line of sewing is now the top edge of your skirt.
Measure down 3/8” (10 mm) from the top edge and mark or pin. Sew a straight line 3/8” (10 mm) from the top edge along the length of your fabric.
Stop sewing about 2” (5 cm) before you get back to the starting point.
Repeat until you have your desired number of channels.
Cut the elastic to match your desired number of channels. Take a safety pin and attach it to one end of one piece of elastic. Insert this into one side of that 2” gap and thread all the way through. Pin or tie the elastic together for the moment. Repeat for all channels.
Carefully(!) turn your skirt the right way out, try it on, and move the elastics until everything’s comfortable around your waist. Pin or mark the elastics at that point.
Sew each elastic together. The zig zag stitch on a machine is great for this; go over it lots of times to secure.
Finally, go back and complete the original lines of stitching to close the gaps.
TIED OPTION:
Instead of elastic, you have the option to insert ties. Make sure to leave the 2” gap open here otherwise you won’t be able to reach the ends!OPEN SIDE OPTION:
You could choose to leave your skirt open to one side (and wear leggings or shorts underneath). For this option, just omit the first step of sewing the short edges together. This gives you a length of fabric with multiple casings at the top for ties. You might prefer to finish the short edges for neatness and longevity.
can i make a top to match?
Yes! It’s basically another skirt hiked up under your arms.
Instead of measuring your waist you’ll need two chest measurements – under the arms and across the fullest part of your bust.
For the fabric: length = (full bust measurement) x 1.5. So if your full bust measures 40 inches (101 cm), you’ll need to buy around 60 inches (152 cm) of fabric. If you want a looser top or more volume, fabric length = (full bust measurement) x 2 (or more).
For the 1″ elastic: length = (chest measurement under arms); buy a little extra so you can adjust the fit for comfort.
You also have the option to make multiple channels here with 1/4″ elastic: length = (chest measurement under arms) x (number of channels)
Follow the instructions for a single- or multiple-channel pa’u skirt with or without a top frill.
You now have a very long, straight tube dress that can be worn exactly as-is under your pa’u skirt. If you find the tube too tight on the lower body, cut off the excess fabric so the bottom edge hits around the top of the thigh. Any shorter and it might ride up while you dance. You could also add elastic – either in another casing or just sewn on – to gather the bottom edge a little so it sits at your waist, below the top of your skirt.
useful links
(I’m not affiliated with these stores but am a regular customer; prices 05/2019)
Aloha Outlet – pre-made or custom hula skirts and tops, skirt cases, along with a vast range of accessories, clothing, gifts, implements etc.
Aloha Hula Supply – excellent quality implements, plus skirts, artificial lei, pareu, crafting materials, etc.
Amazon: Prym Fray Check
Minerva Fabrics: Impex Fray Stop Glue
Minerva Fabrics: Plain Polycotton Fabric £2.99 per metre
Fabricland: Plain Polycotton Fabric from £2.39 per metre (10+ metres £1.99 per metre)
Fabricland: Plain Cotton Fabric £3.99 per metre
Minerva Fabrics: Polyester Cord from £0.29 per metre
Minerva Fabrics: Anorak Cord £0.19 per metre
Minerva Fabrics: Round Leisurewear Cord £0.49 per metre
Minerva Fabrics: Chunky Cotton Rope Cord £0.79 per metre
Minerva Fabrics: Rayon Lacing Cord £0.59 per metre
